
Time is Colour
repair guide
Replacing the Screen
Step 1
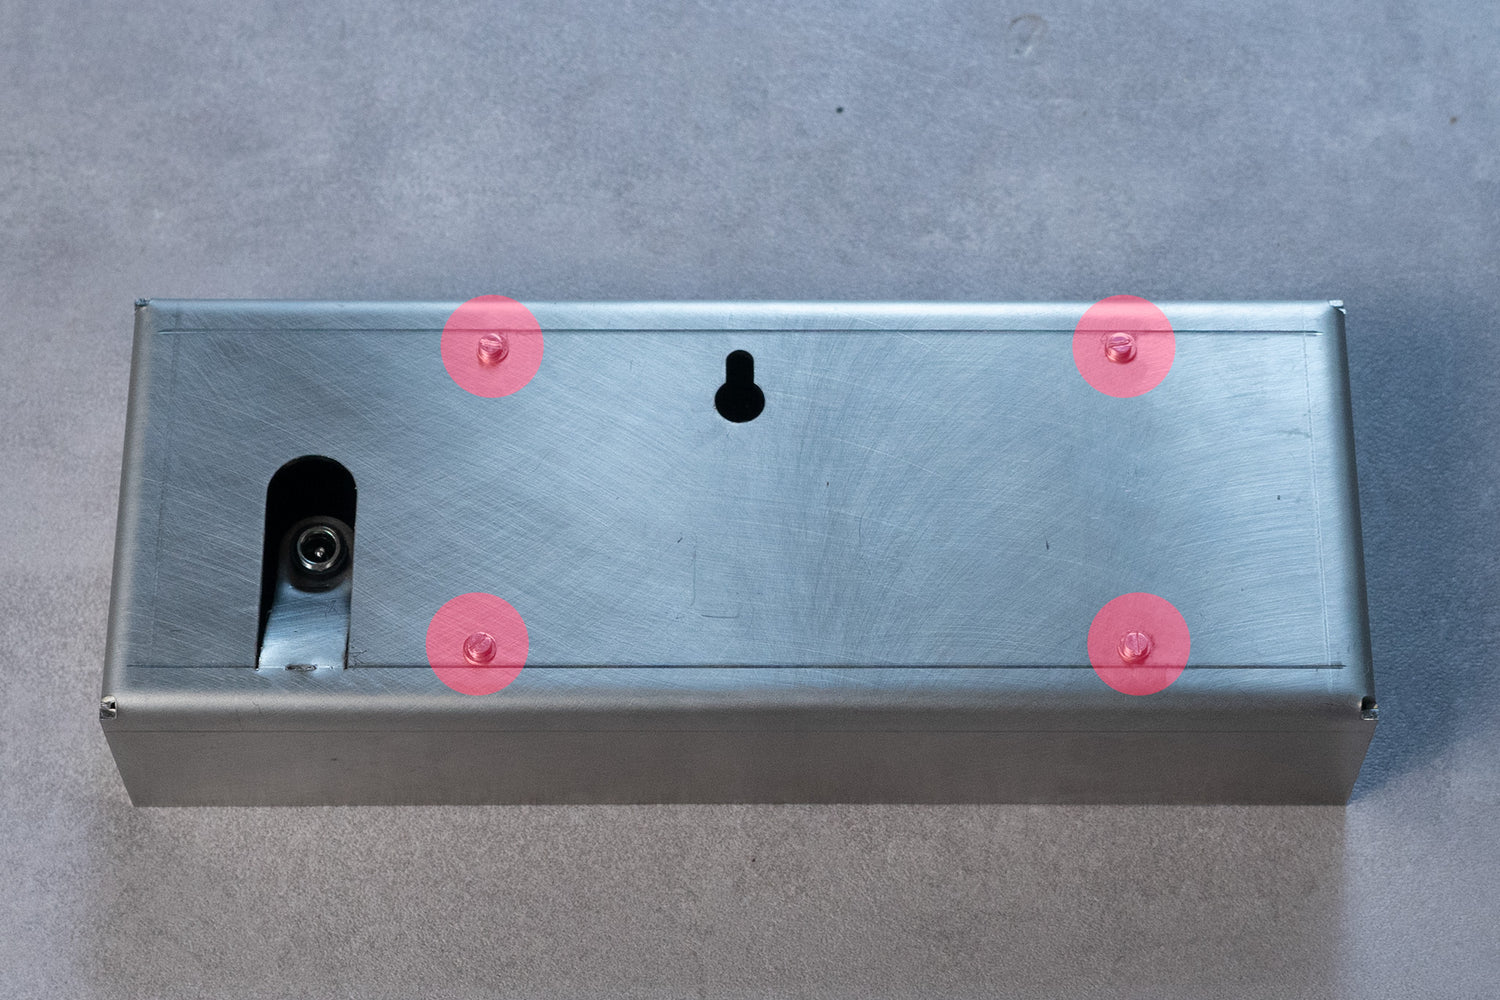
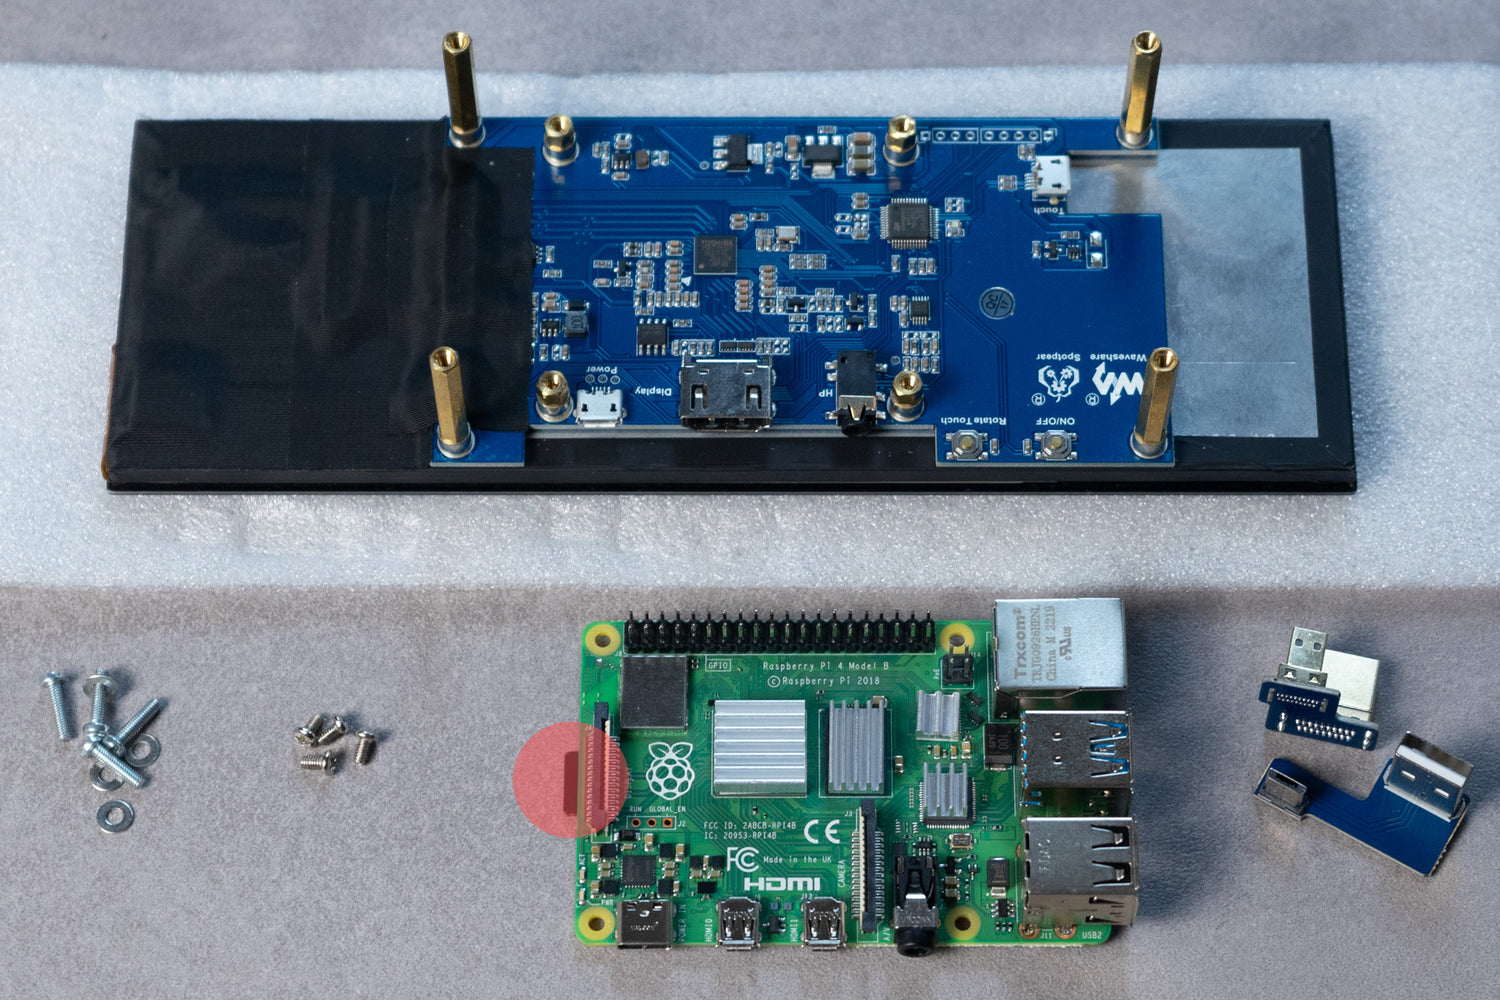
Remove Case
Remove the 4 screws on the back of the case and gently separate the internals from the box.
step 2
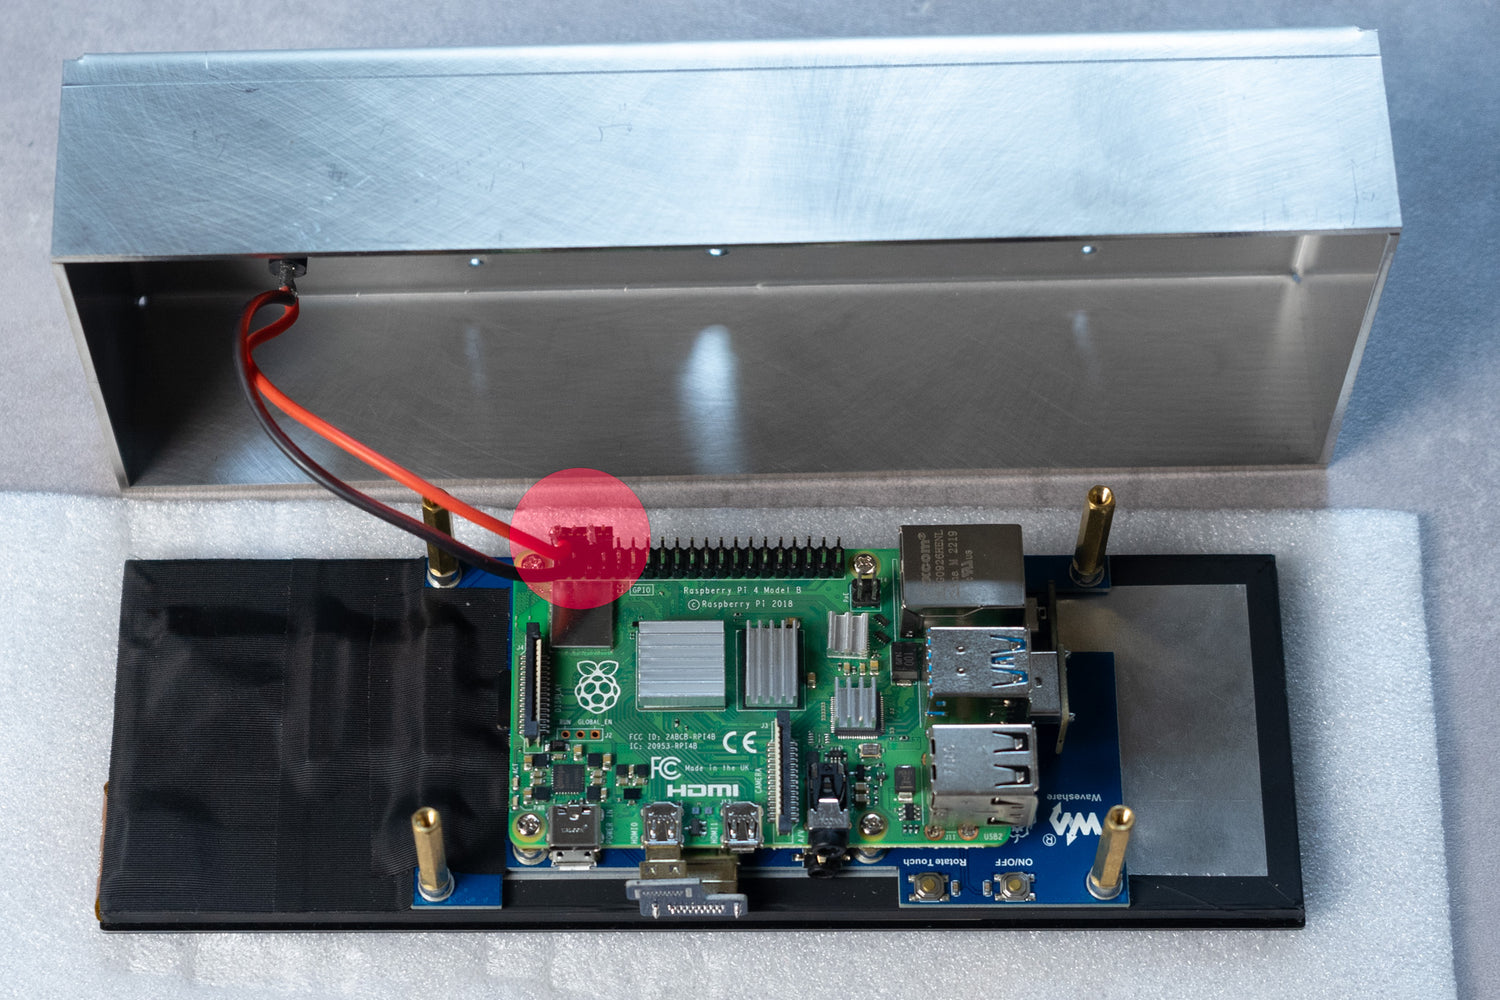
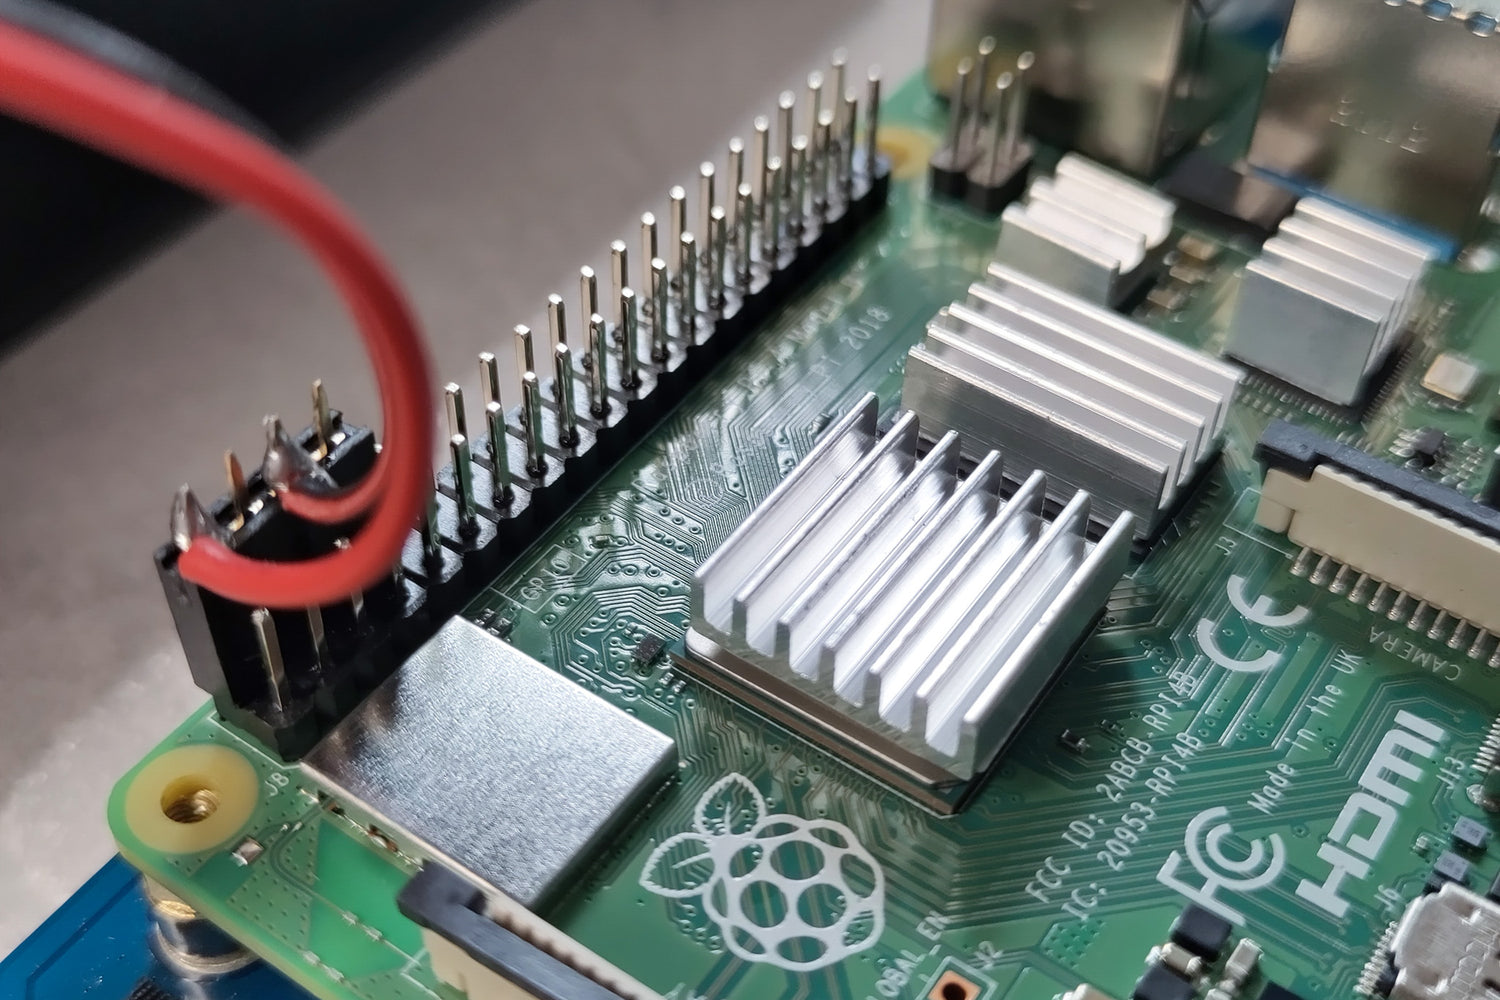
Disconnect Power
Remove the female header socket from the Raspberry Pi4 GPIO pins to disconnect power cable.
Step 4
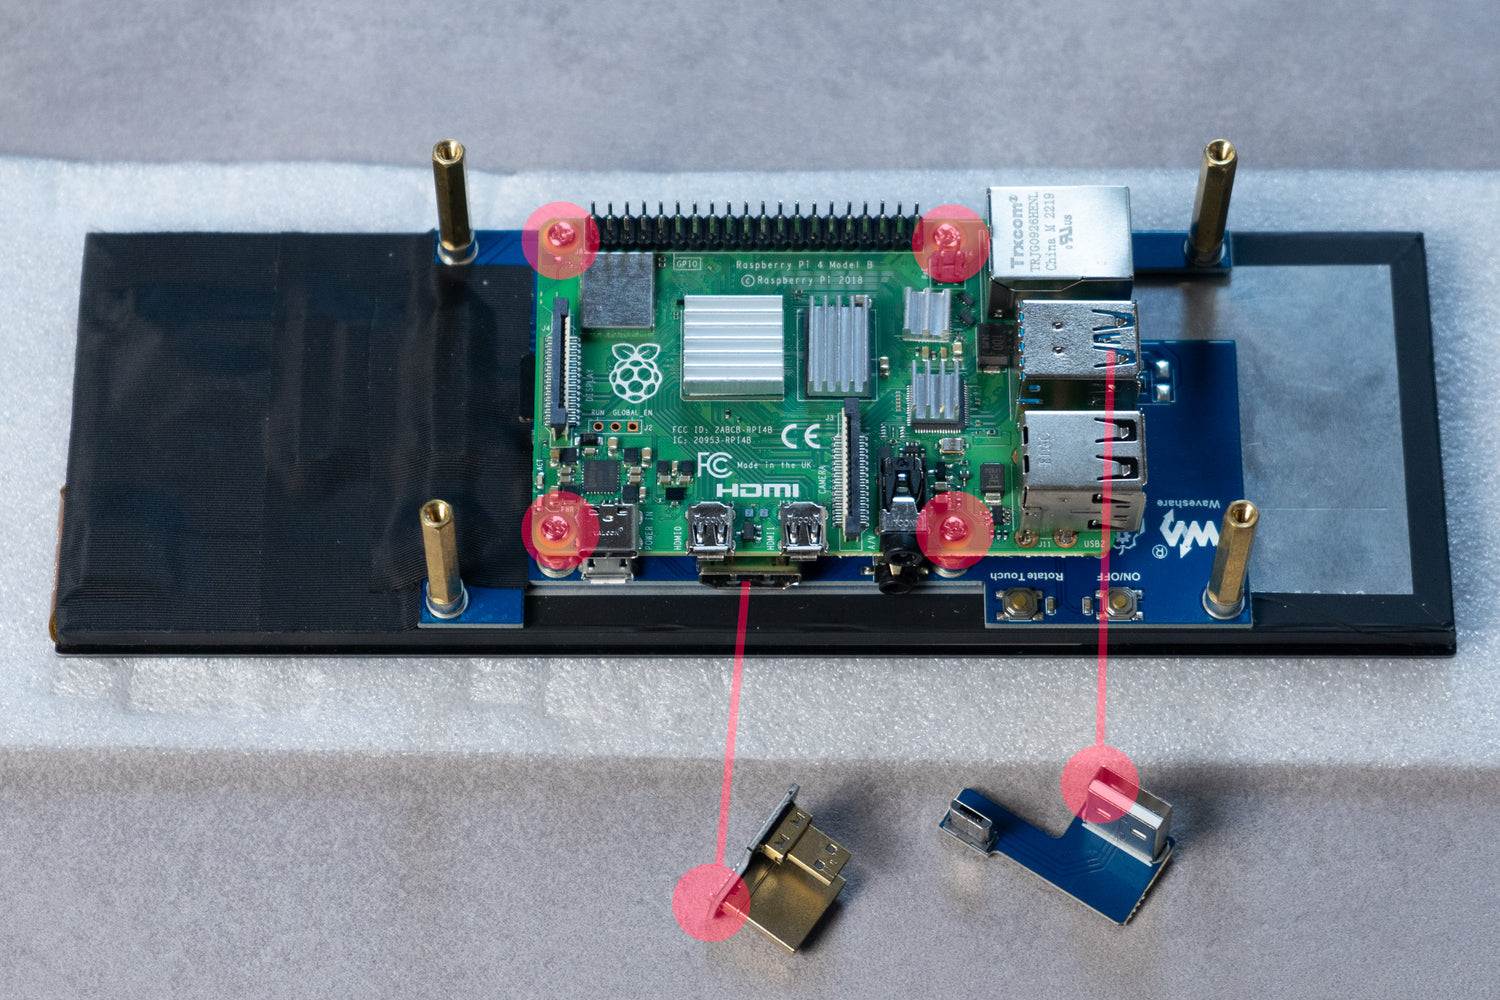
Disconnect Raspberry Pi4
Remove the 4 screws and 2 adapters (HDMI & USB) that connect the Raspberry Pi4 to the touch screen.
Step 6
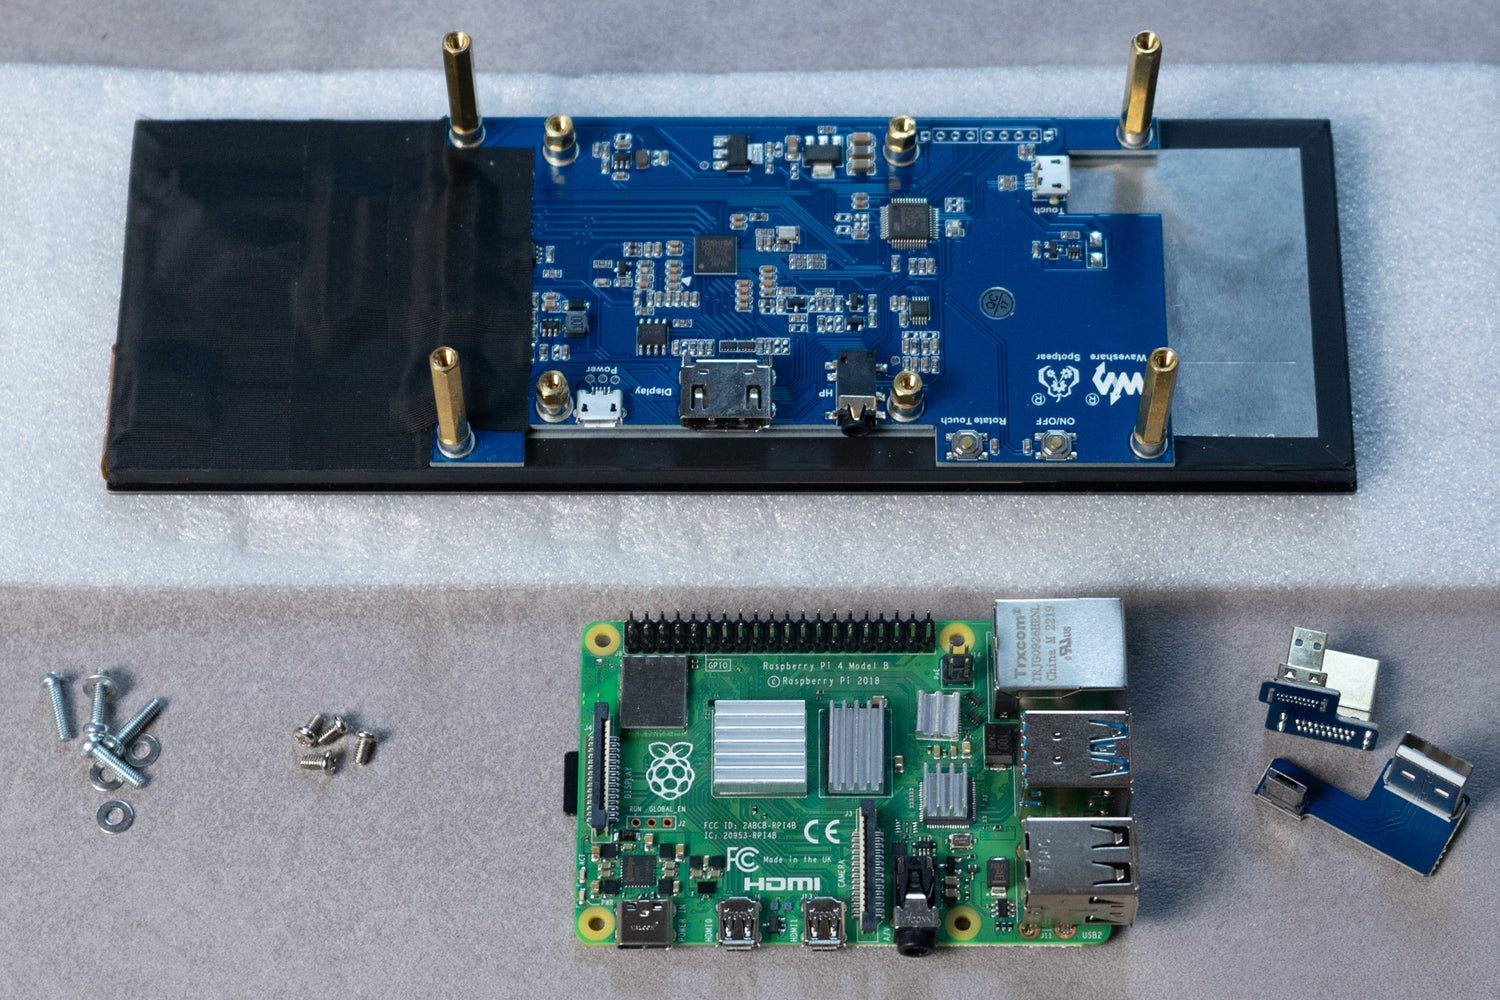
Connect Power
Ensure that the power cable is connected to the GPIO pins in the exact manner as depicted in the image.
Replacing the Raspberry Pi
Step 1
Swap SD Card
Observe the instructions outlined above, but instead of swapping out the screen, replace the Raspberry Pi 4B 2GB and switch the SD card.

Step 2
Obtain License
Reach out to NAP Labs and provide them with your machine ID in order to acquire a new license. The machine ID is presented on screen after boot.